Before You Start
- Device is rooted (Magisk recommended) and LSPosed (or a compatible Xposed framework) is installed and running.
- Latest HideMyAndroid APK installed from the official app portal.
- Companion app Device Fingerprint (com.wowsoftware.devicefingerprint) installed to verify spoofed values.
- Stable internet connection to sign in and activate your license.
Get the apps you'll need
Quick Start Guide
This section contains 10 steps to help you set up and use HideMyAndroid quickly. Screenshots reflect the latest redesigned interface.
Watch the full installation walkthrough
Prefer to watch? This video walks through the entire setup, step by step.
Step 1: Install HideMyAndroid
Install the latest HideMyAndroid APK from the official source. Tap the Download button at the bottom-right of this page to grab it.
- Allow installs from unknown sources if Android prompts you.
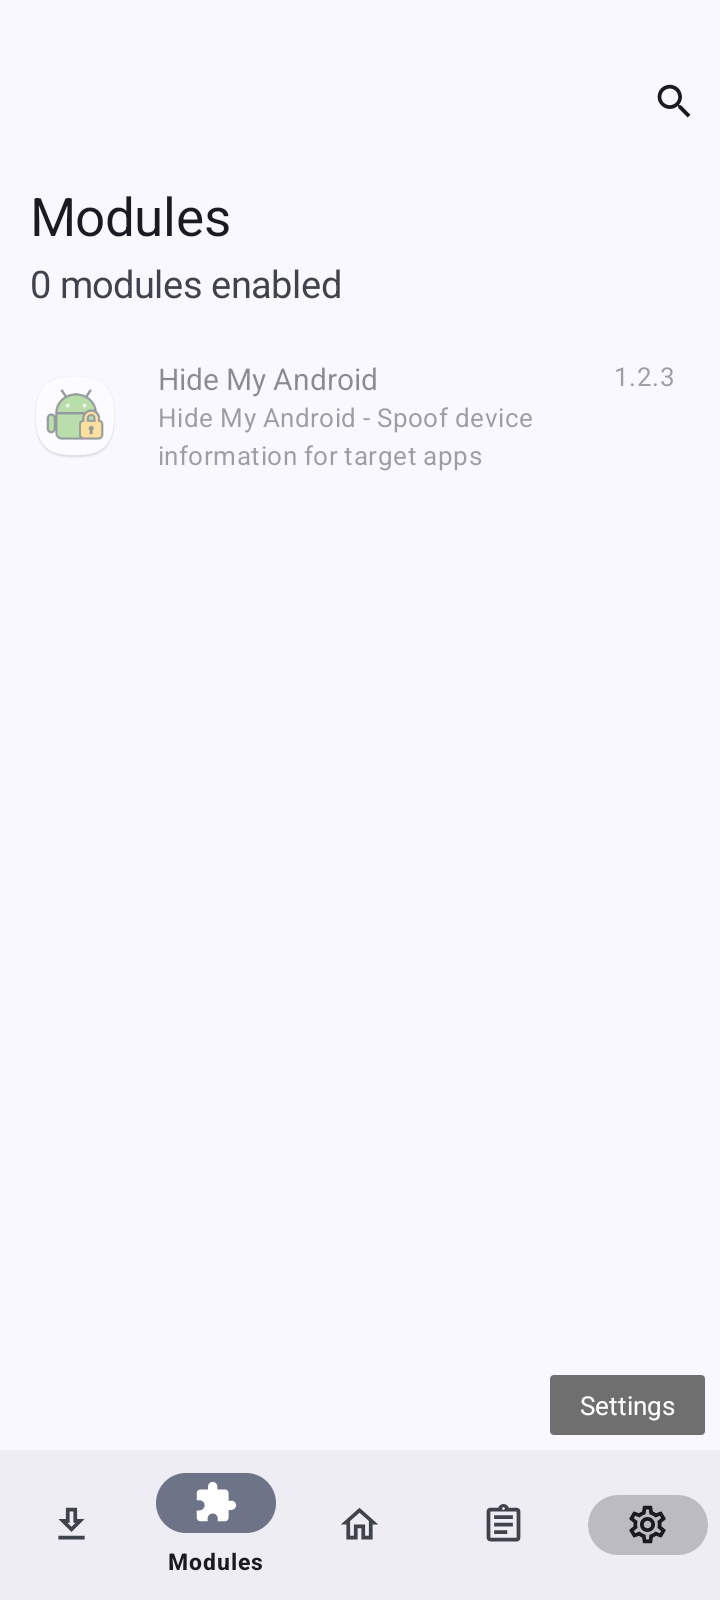
Step 2: Enable the module in LSPosed
Open LSPosed Manager and switch on the HideMyAndroid module, then choose the apps it should hook into.
- Open LSPosed Manager > Modules and tap Hide My Android.
- Turn on Enable module at the top of the screen.
- Tick System Framework (required) and Device Fingerprint, plus any other apps you want to spoof (Facebook, Firefox, Galaxy Wearable...).
- Reboot or soft-reboot the device so LSPosed loads the module.

Step 3: Choose your language on first launch
Open the HideMyAndroid app. On first launch you will see the welcome screen with a language picker.
- Pick English, Русский or 中文.
- Tap Next to continue to the sign-in screen.

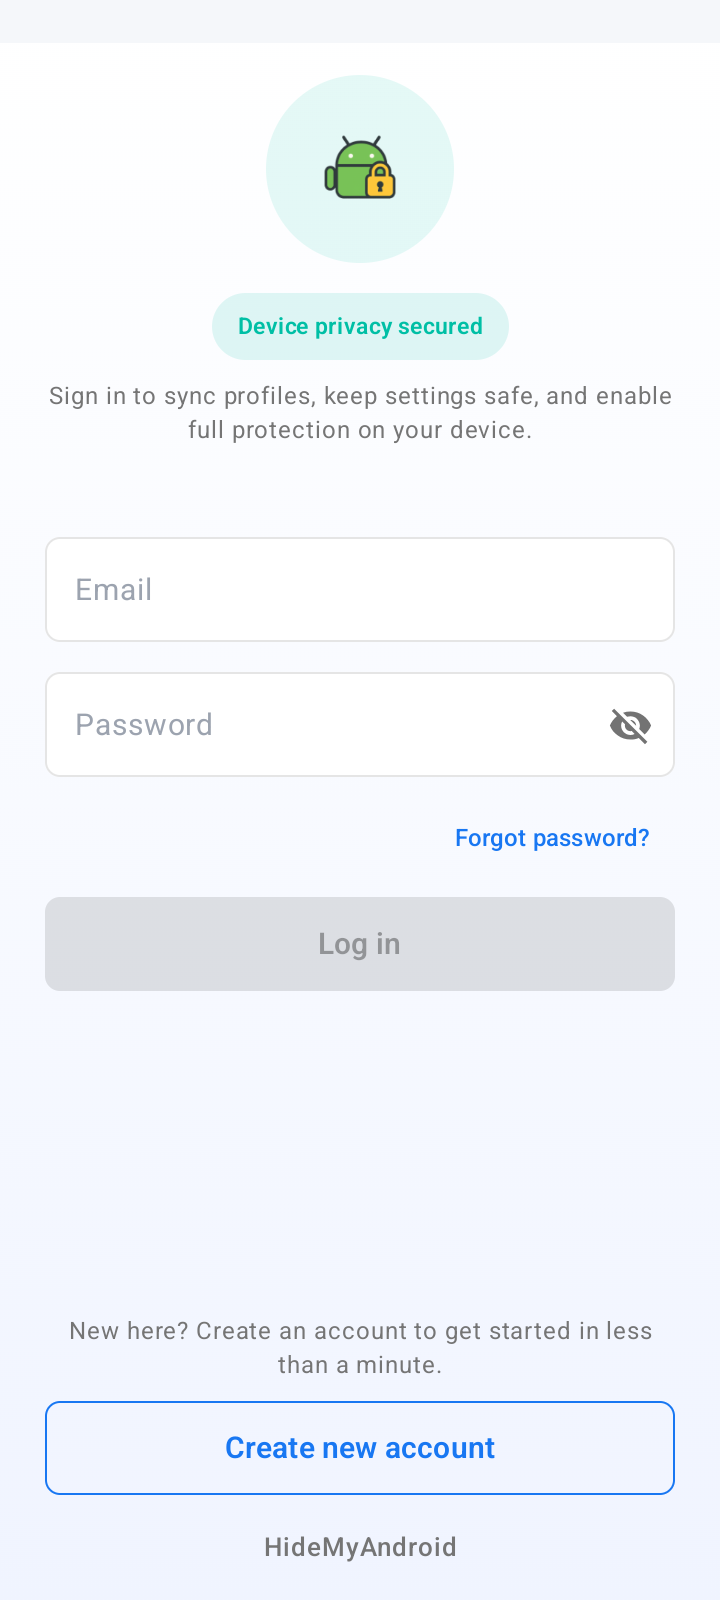
Step 4: Sign in or create an account
Sign in to sync profiles and unlock the full feature set. A free account works for Freemium features.
- If you already have an account: enter Email + Password and tap Log in.
- If you do not: tap Create new account at the bottom and follow the wizard.
- Premium features (SIM Simulation, Browser Fingerprint, full identifier spoofing, virtual account isolation...) require a paid plan.
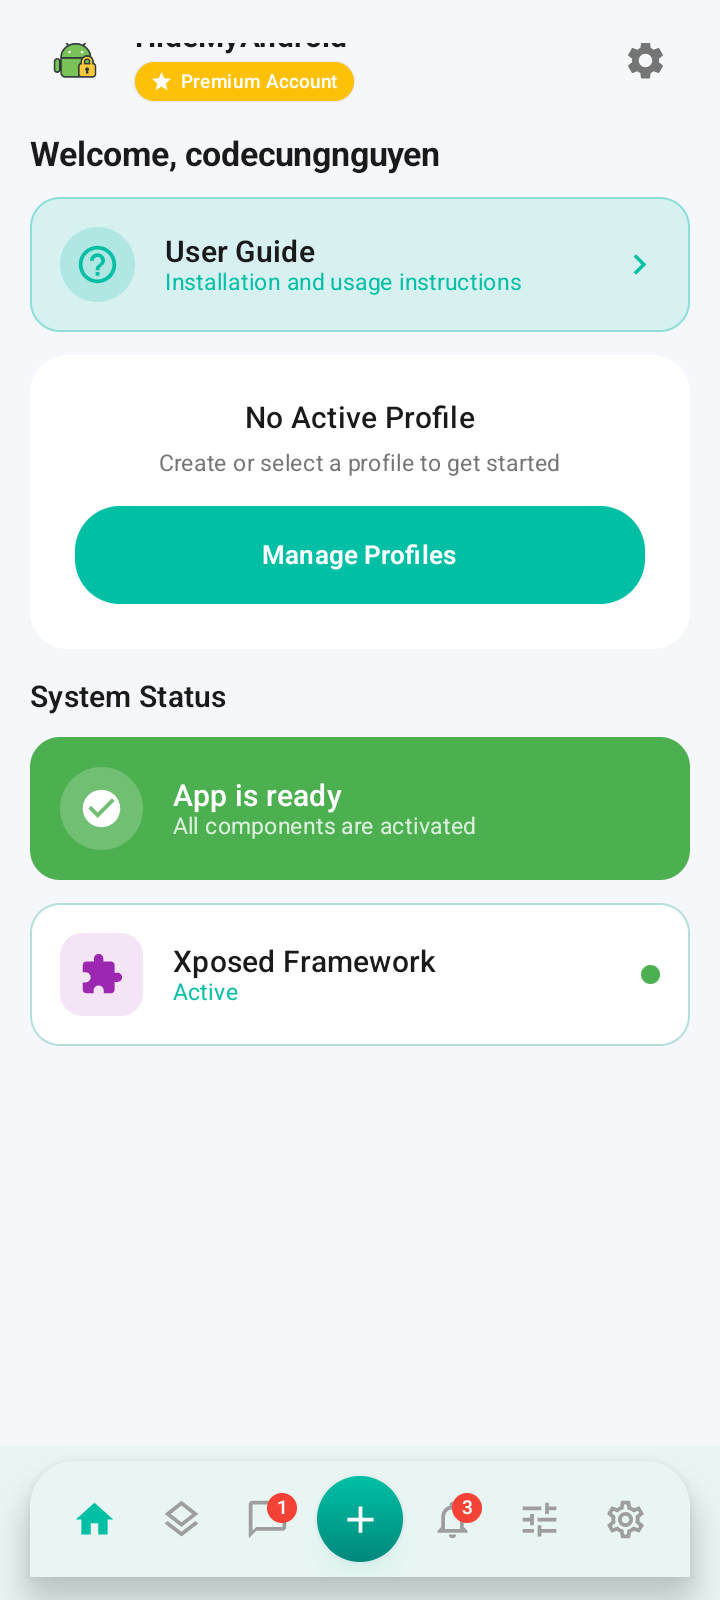
Step 5: Reach the dashboard and grant Superuser
After signing in you land on the main dashboard. Confirm the system is healthy, then grant root access to the app.
- Check that App is ready and Xposed Framework is Active.
- No Active Profile means no profile is running yet — this is expected.
- Tap the teal + button on the bottom navigation bar to start creating a profile.
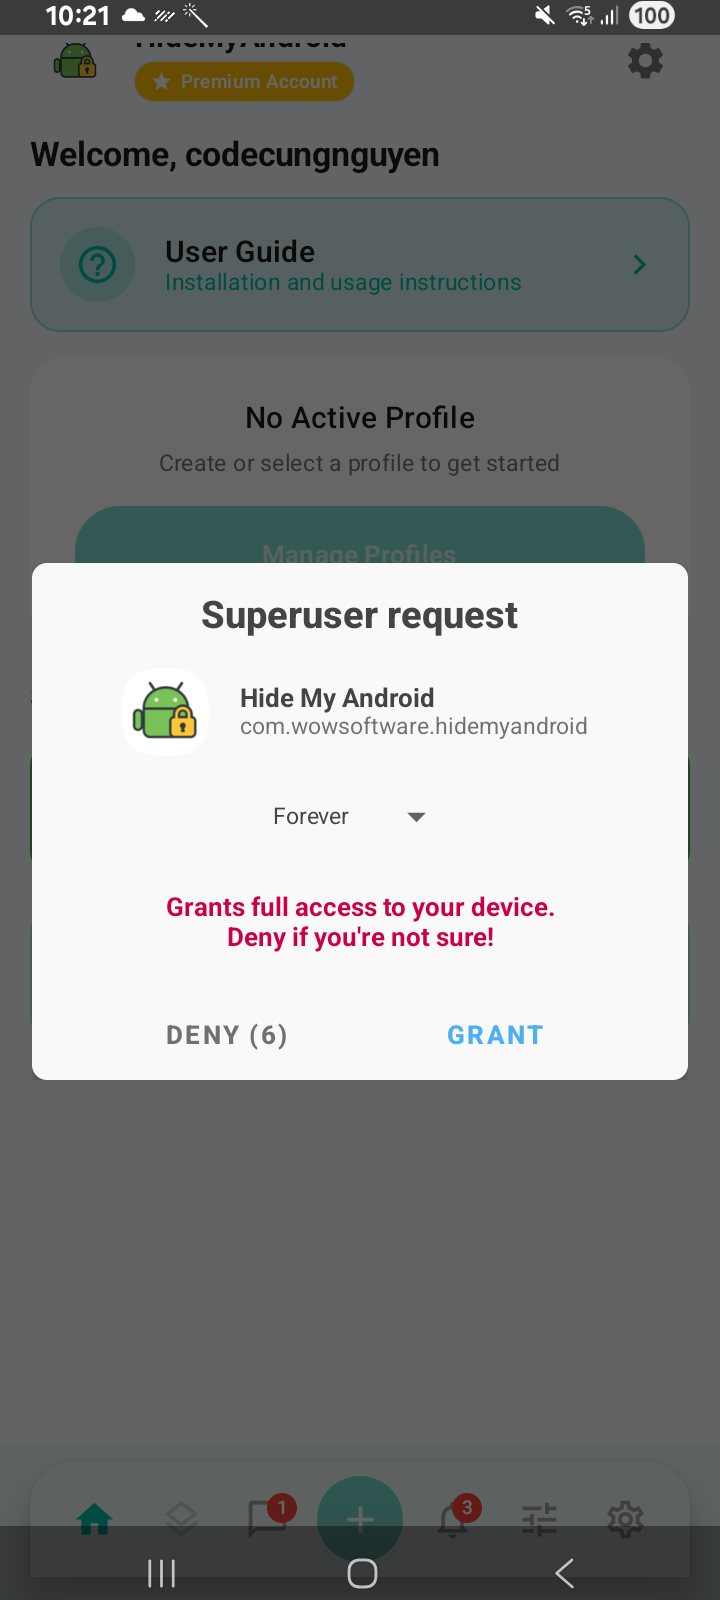
- On first tap, a Superuser dialog appears. Choose Forever and tap GRANT.
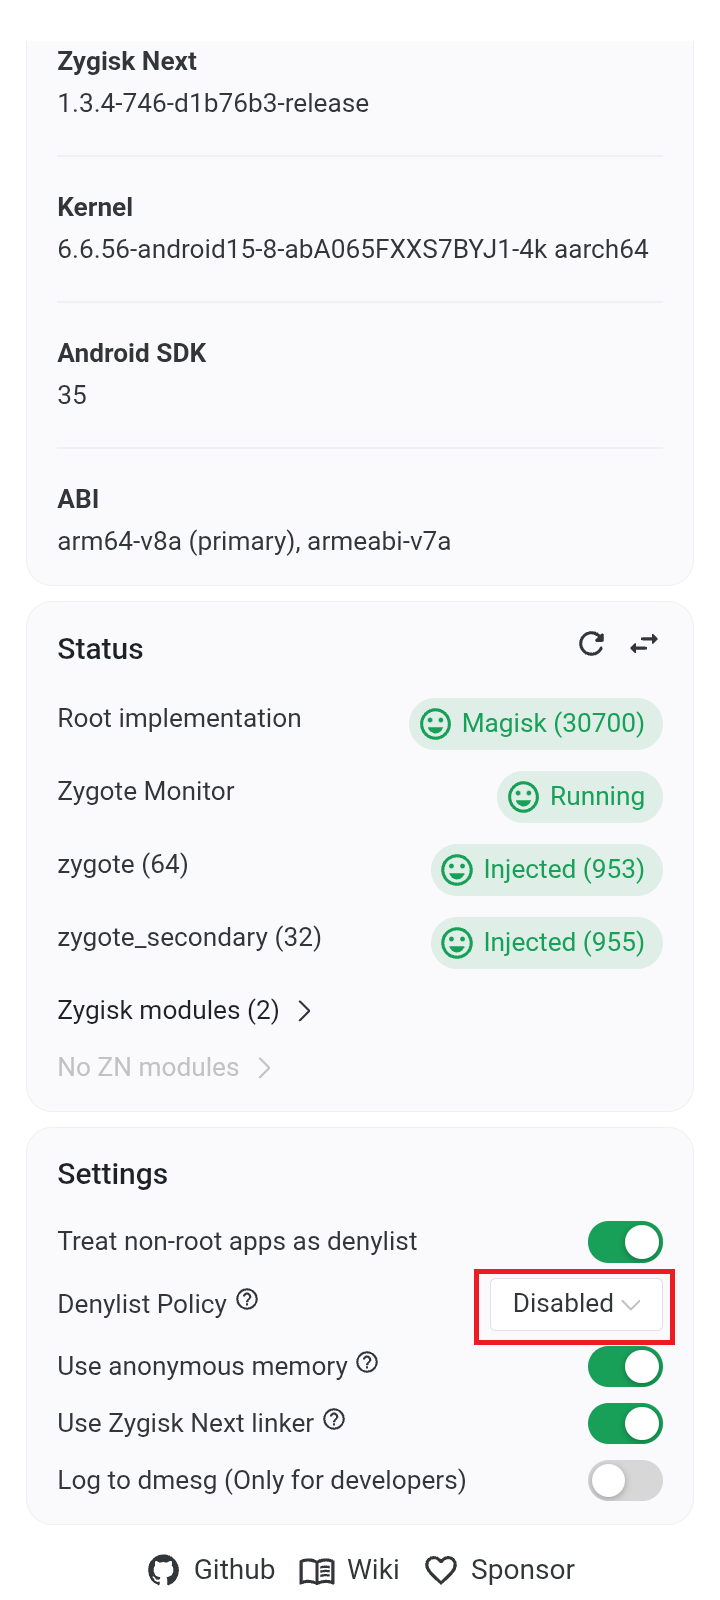
- If the Superuser dialog never shows up, you likely have Zygisk Next running in unmount mode. Open Zygisk Next, set Denylist Policy to Disabled (see screenshot), then fully close HideMyAndroid and reopen it before tapping + again.
- If you tapped DENY by mistake, re-grant the permission in Magisk/KernelSU > Superuser, then fully close HideMyAndroid and reopen it before tapping + again.
Step 6: Create a new profile
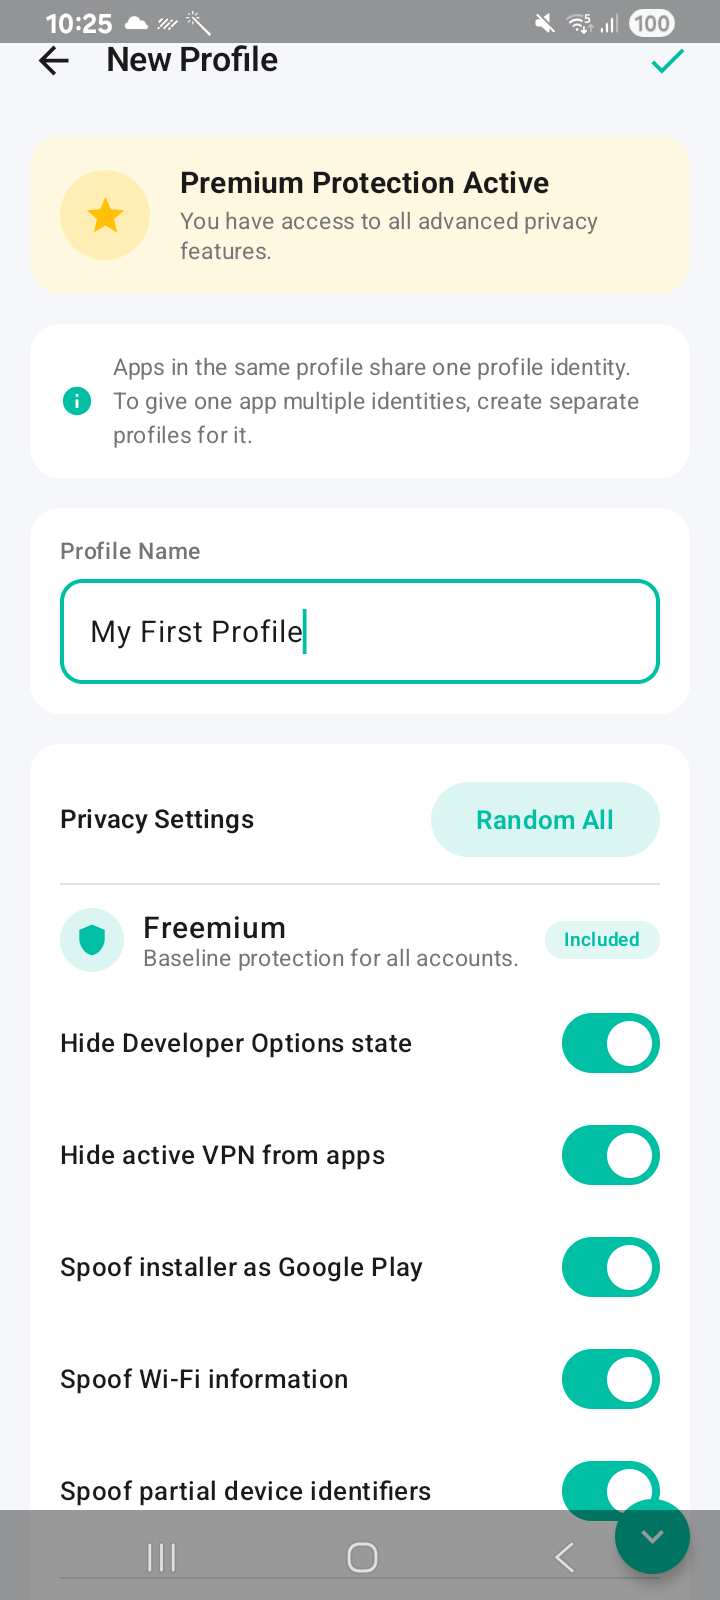
After granting root, the app opens the New Profile screen. Name the profile, set its profile-level values, and tune the protections you want.
- Enter a Profile Name, for example My First Profile.
- Tap Random All under Privacy Settings to regenerate the profile-level SIM info and Gmail account. These two are shared by every app you later assign to this profile.
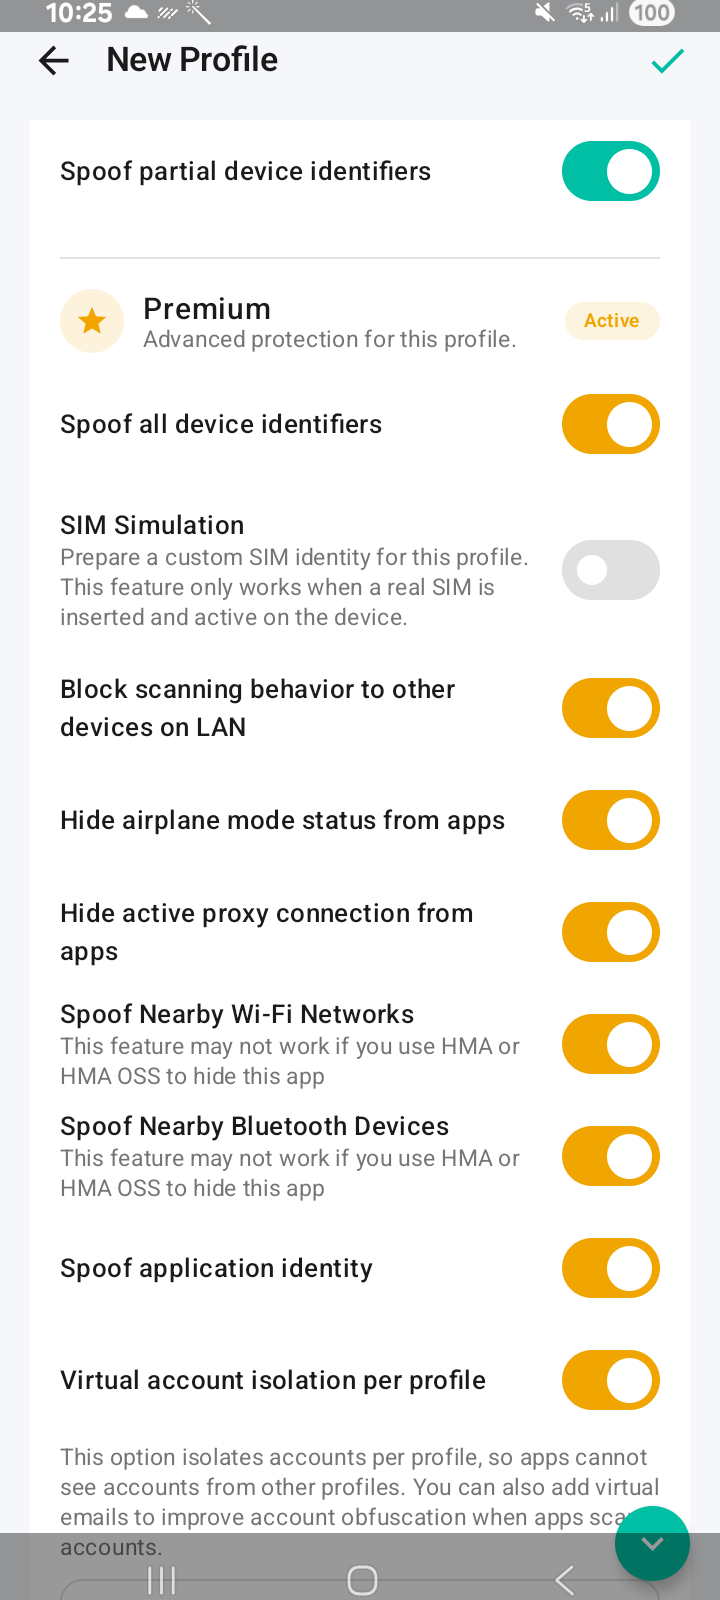
- Toggle individual protections (Hide Developer Options, Spoof Wi-Fi, SIM Simulation, Spoof installer as Google Play, Virtual account isolation per profile, etc.) to fit your needs.
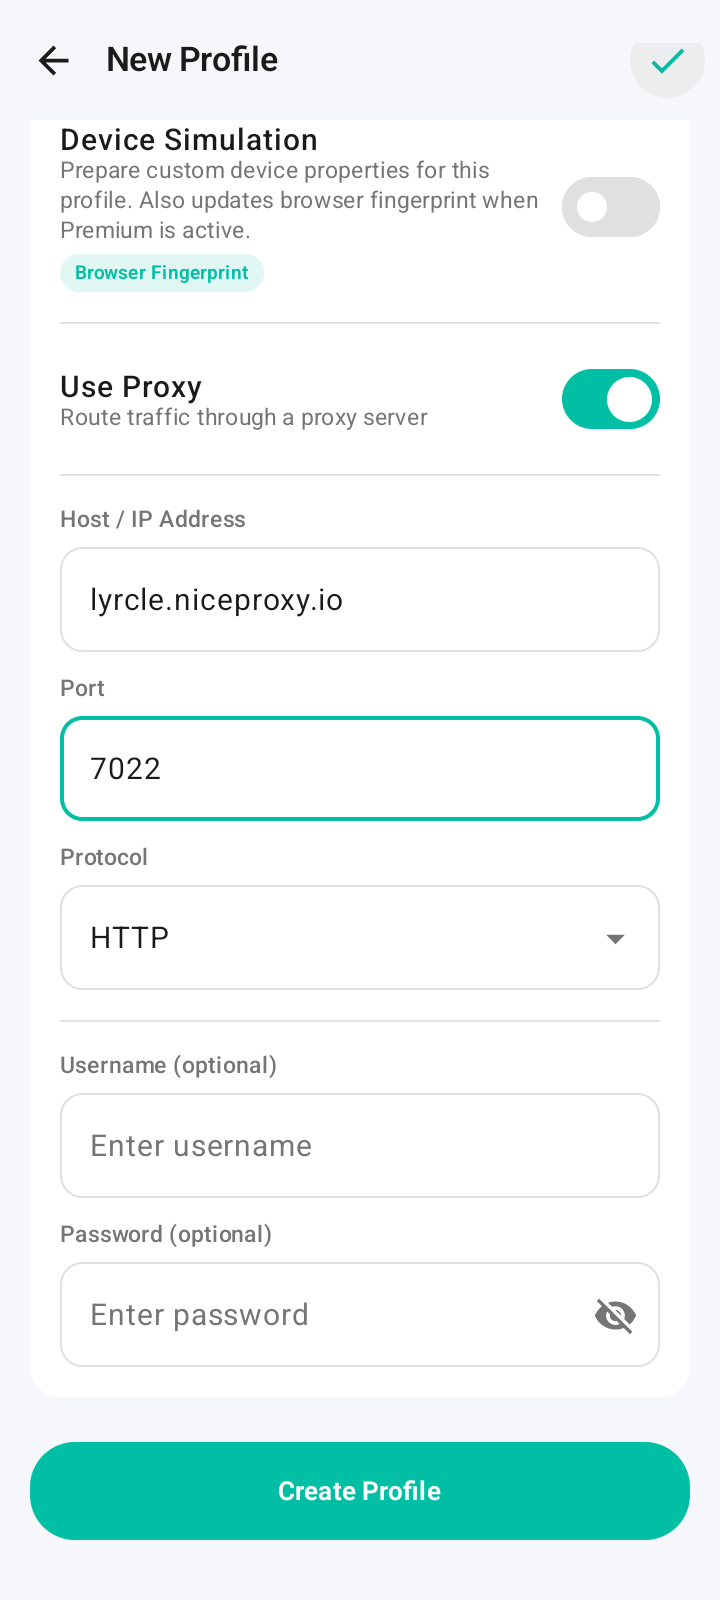
- Scroll down to configure Device Simulation (pick a specific device model — free; the Browser Fingerprint sub-feature is Premium) and Use Proxy (Host, Port, Protocol, optional Username/Password).
- Tap Create Profile to save. The feature list shown is a snapshot — newer releases may add, remove, or rename options.
Step 7: Assign target apps to the profile
A profile is a bundle of identities. Profile-level values (SIM, Gmail, device model, Wi-Fi...) are shared by every app you assign here, while each app also gets its own per-app identifiers (Android ID, App Set ID...) generated the first time you save it into this profile. That per-app identity is then frozen for as long as the app stays in this profile.
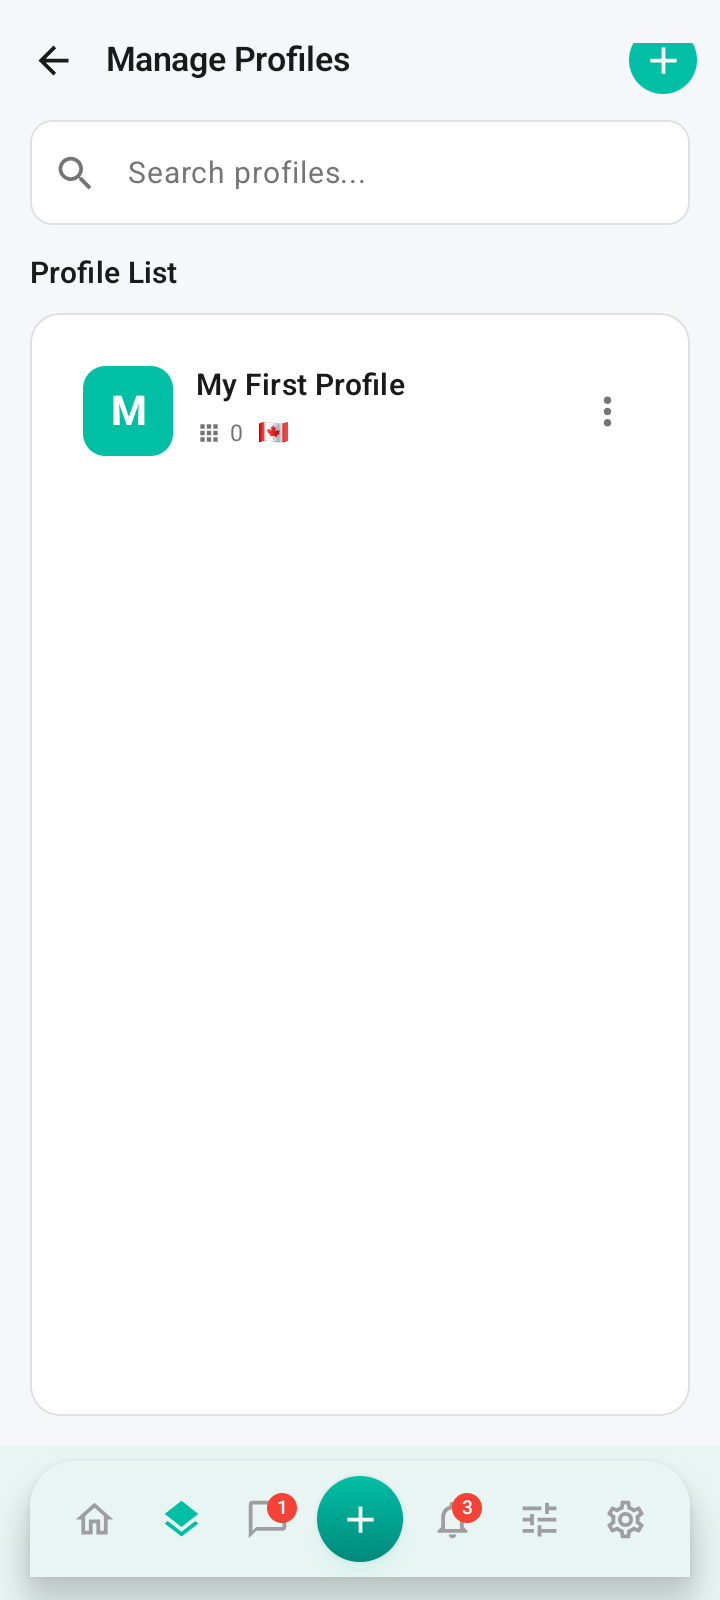
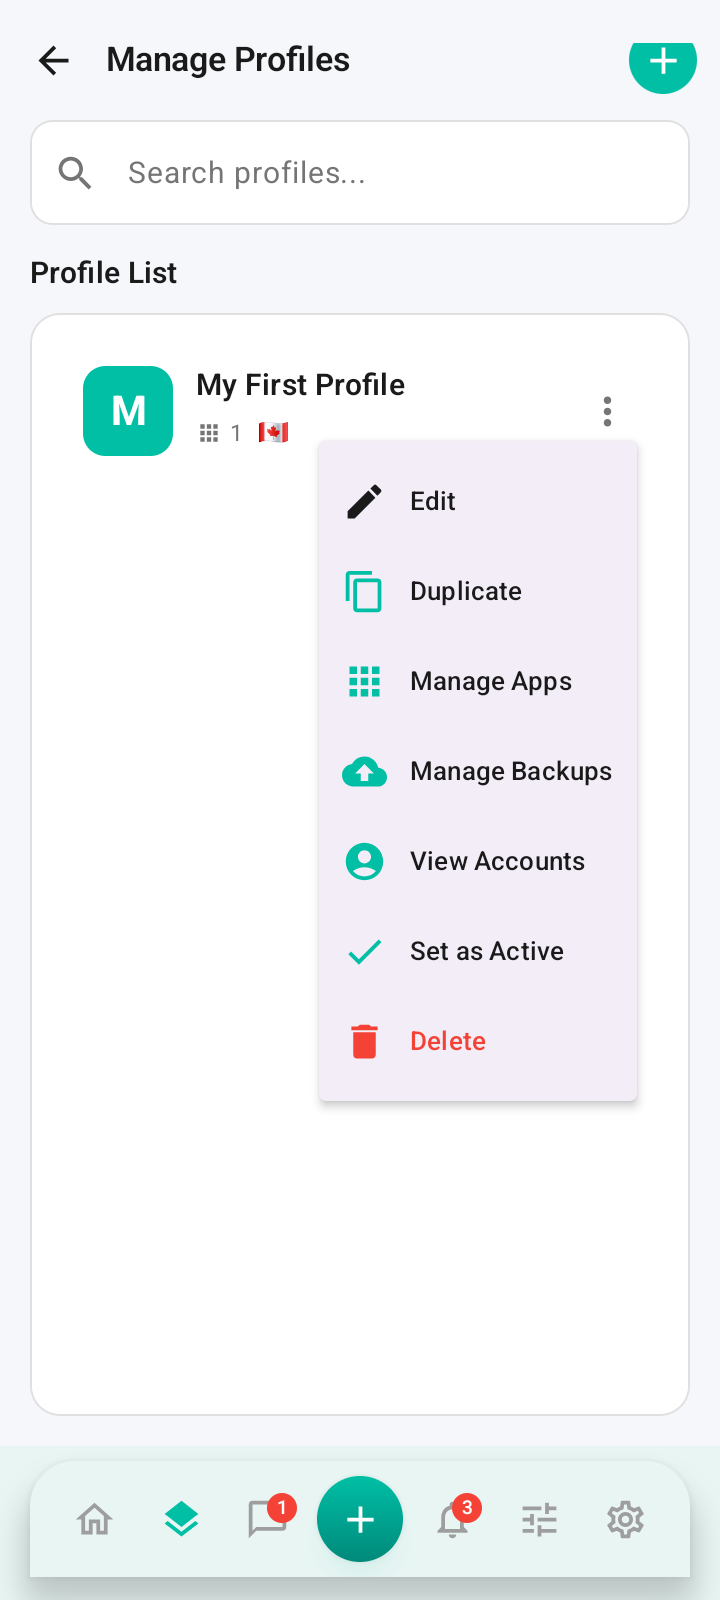
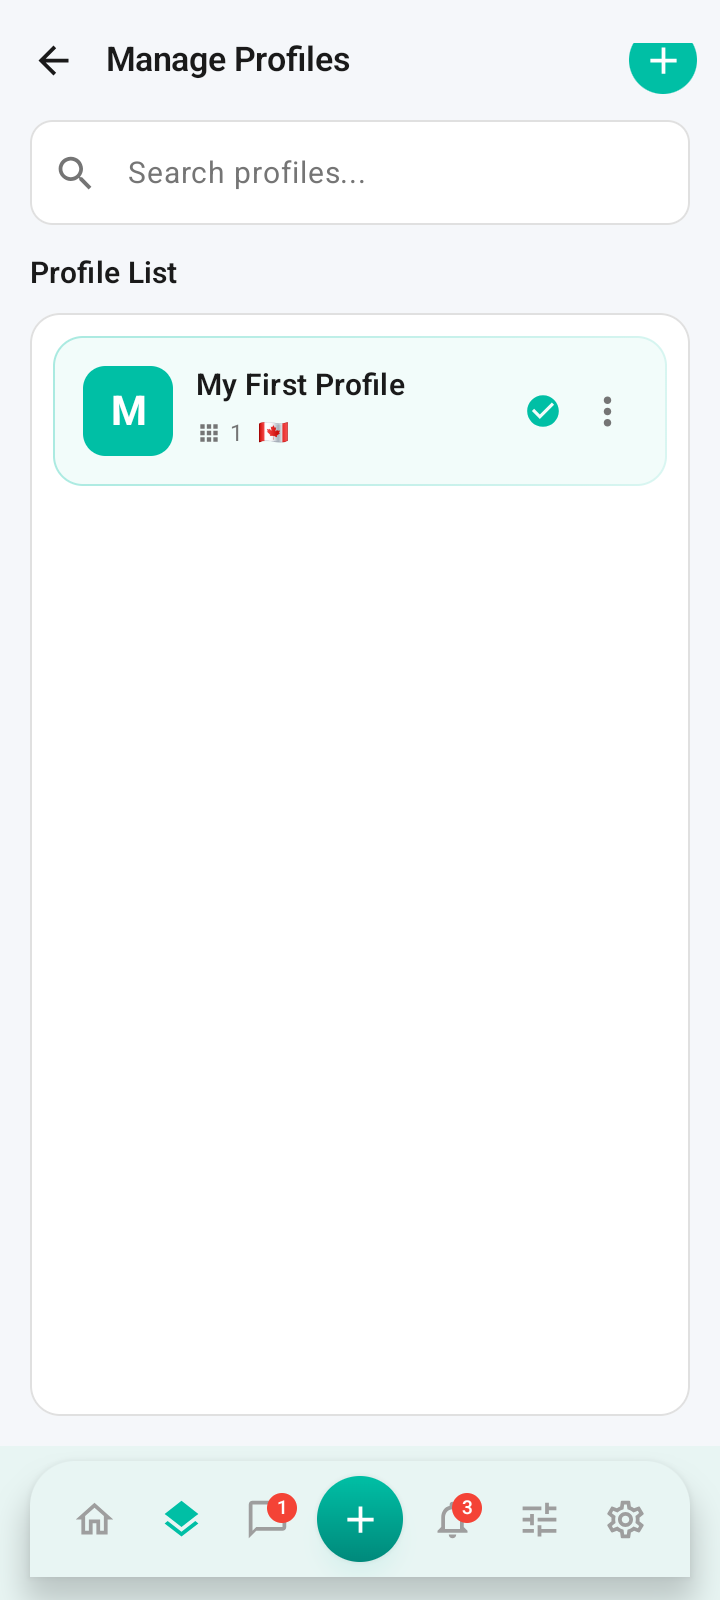
- In the profile list, tap the ⋮ menu on the new profile and choose Manage Apps.
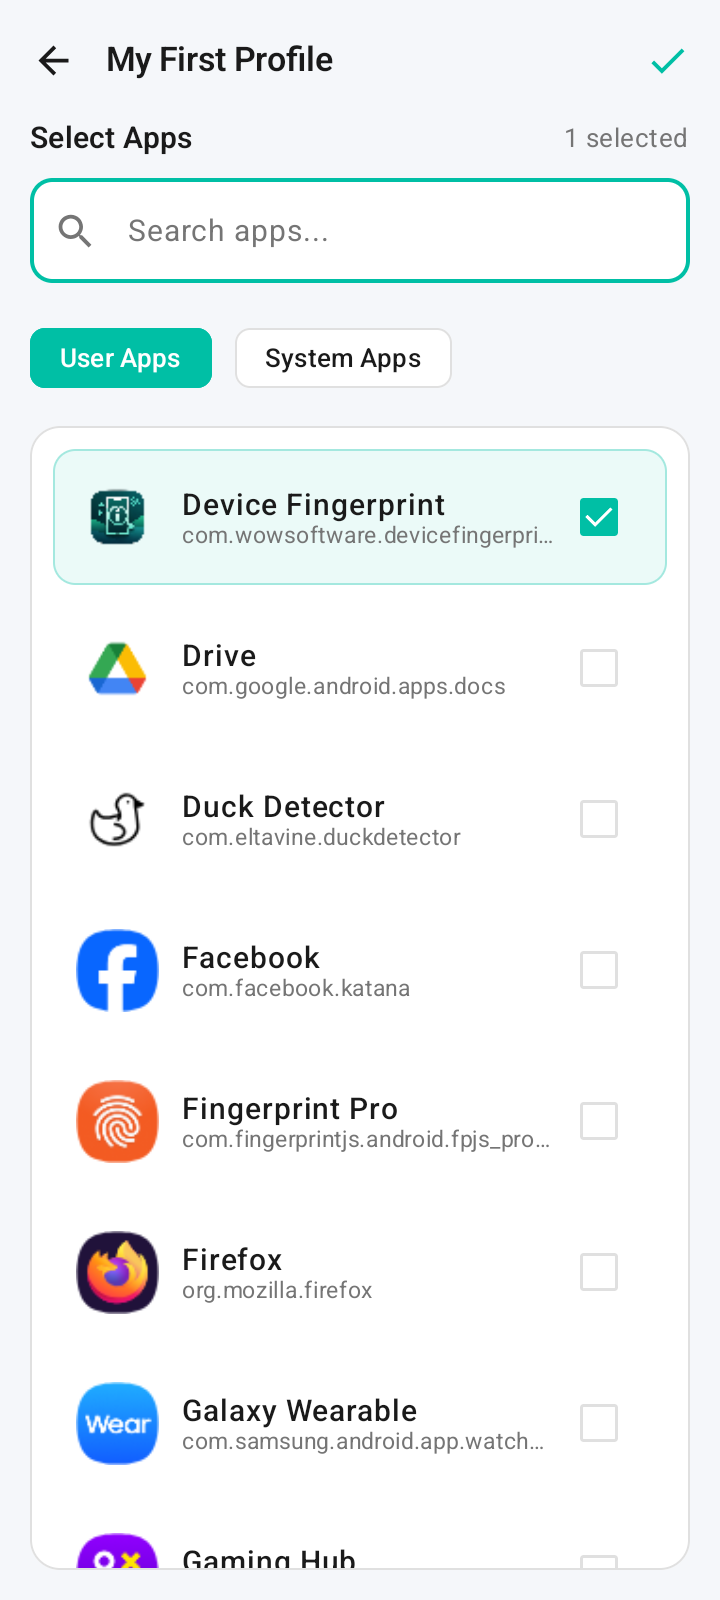
- Switch between User Apps and System Apps tabs.
- Tick the apps that should run under this profile (start with Device Fingerprint to test).
- Tap the ✅ in the top-right corner to save — the per-app identity is generated and locked at this moment. It will not change as long as the app stays assigned to this profile.
- An app can belong to only one profile at a time. To give an app a fully new identity, create a new profile and save the app into it — there is no in-place regenerate.
- Once the profile is active, any app you newly save into it picks up its identity automatically — no reboot or extra setup needed.
Step 8: Activate the profile
Activating the profile applies the spoofed identity to all selected apps.
- Back in Manage Profiles, tap the ⋮ menu and choose Set as Active.
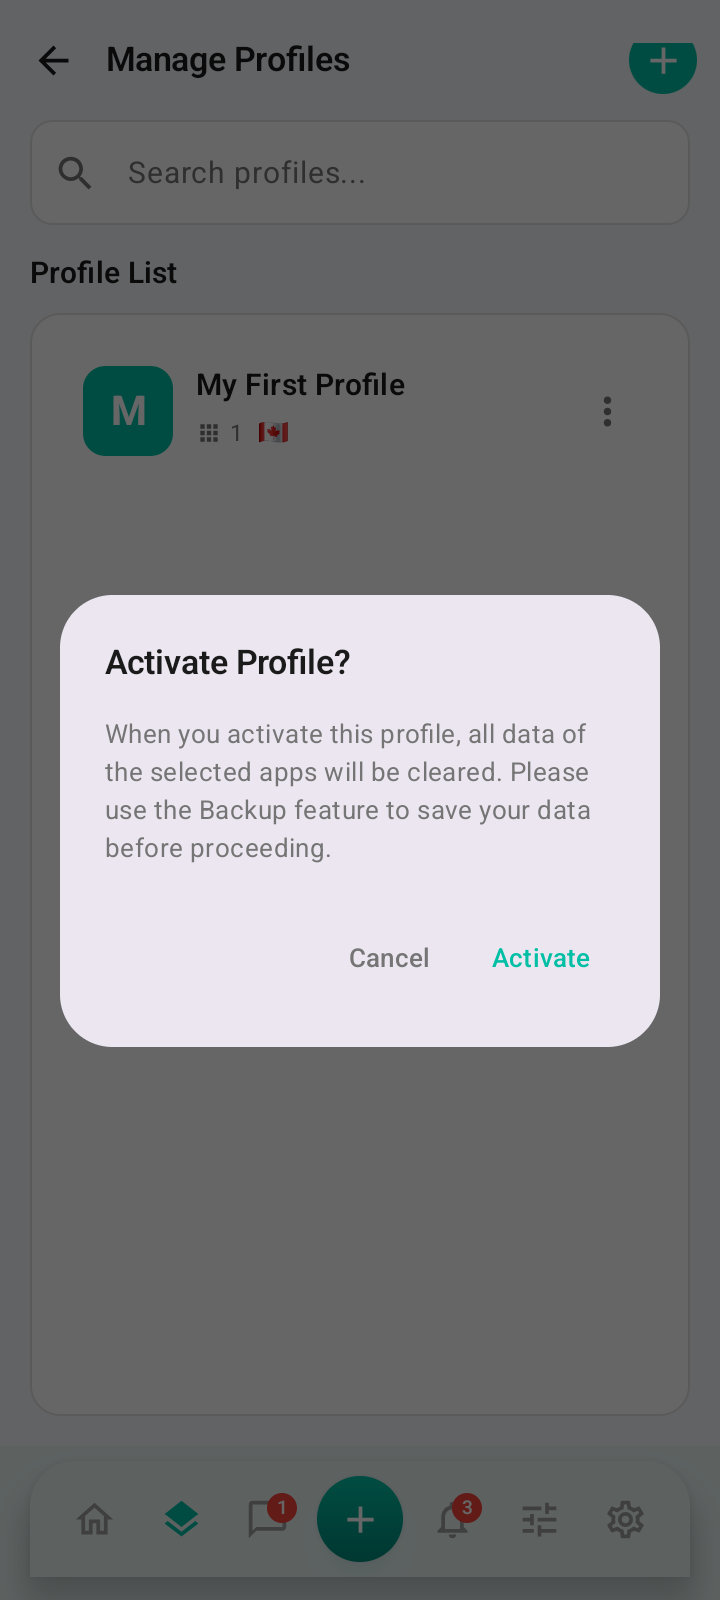
- A confirmation dialog warns that data of the selected apps will be cleared. Use Manage Backups first if you want to keep that data.
- Tap Activate to apply the profile. The running profile is marked with a green ✅.
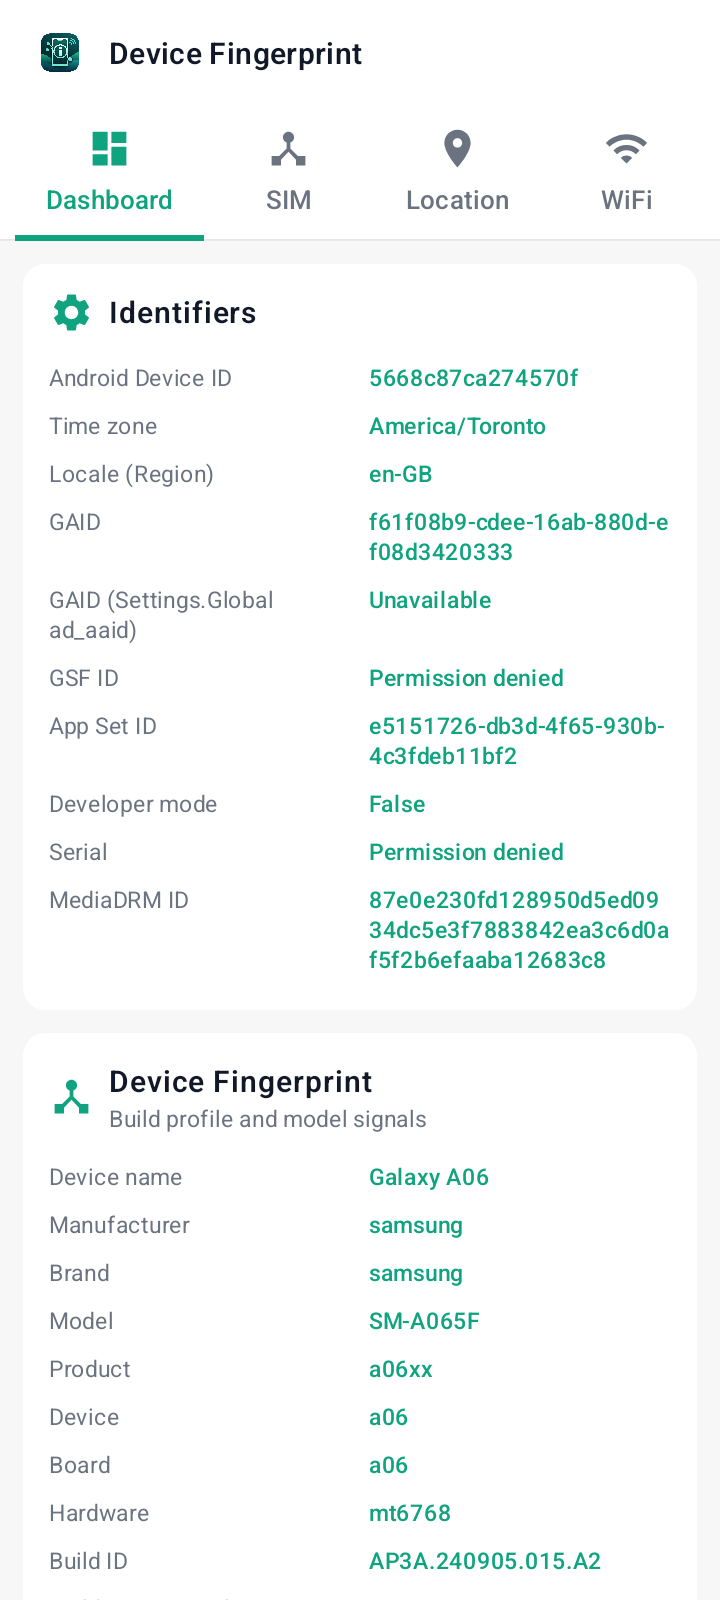
Step 9: Verify with the Device Fingerprint app
Open Device Fingerprint to see exactly what other apps will now read from your device.
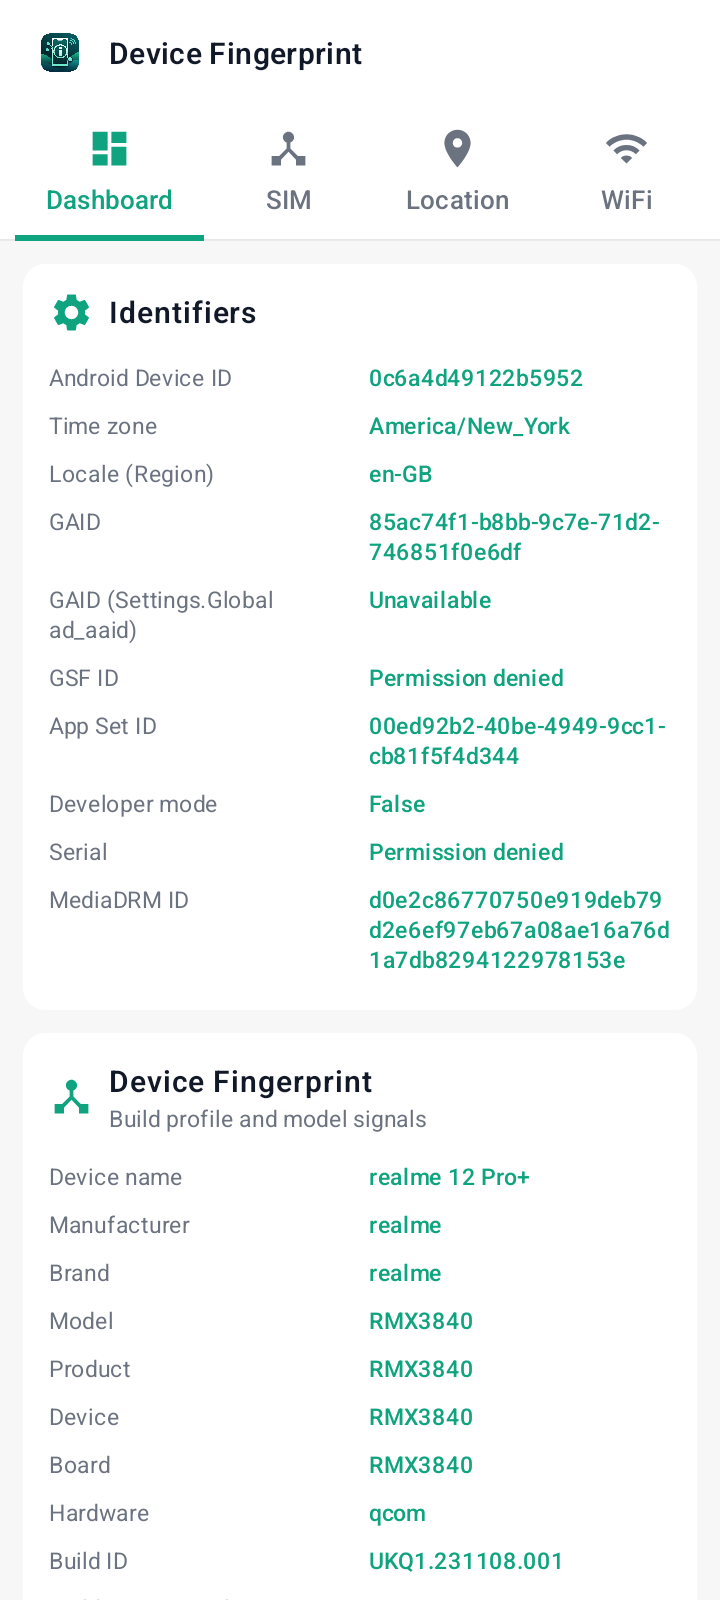
- Dashboard tab — device model, manufacturer, Android Device ID, GAID, timezone and locale match the profile.
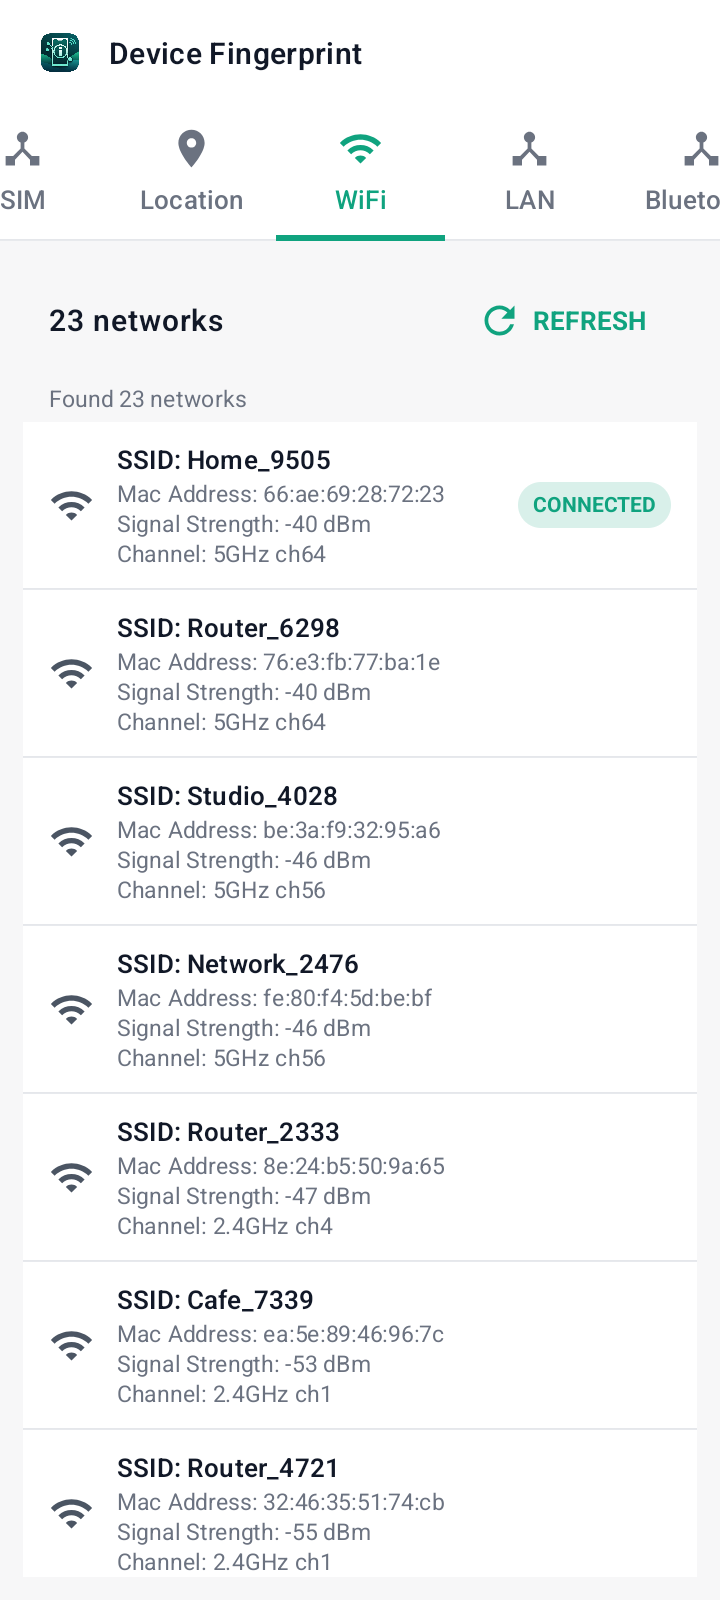
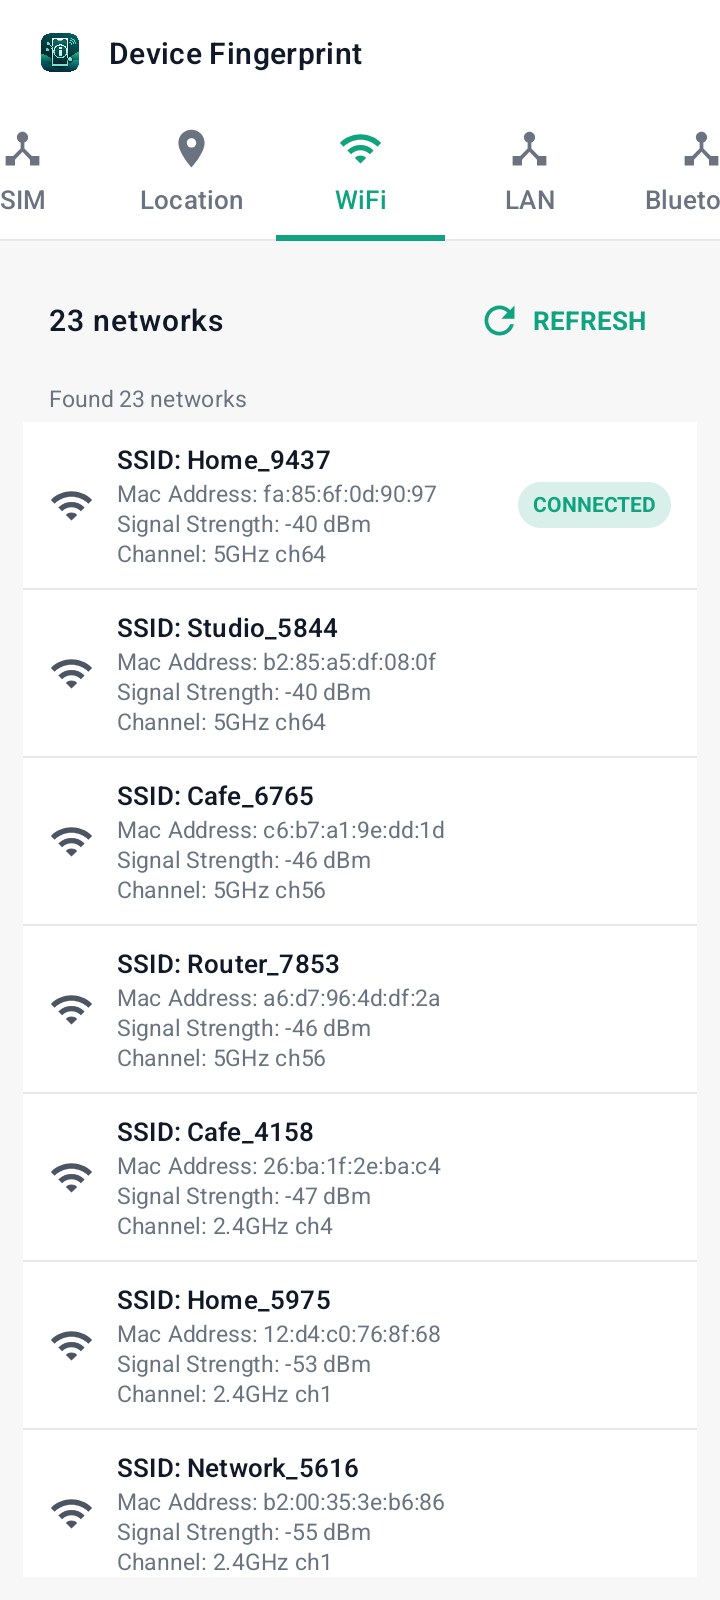
- WiFi tab — the list of nearby Wi-Fi networks is randomized per profile.
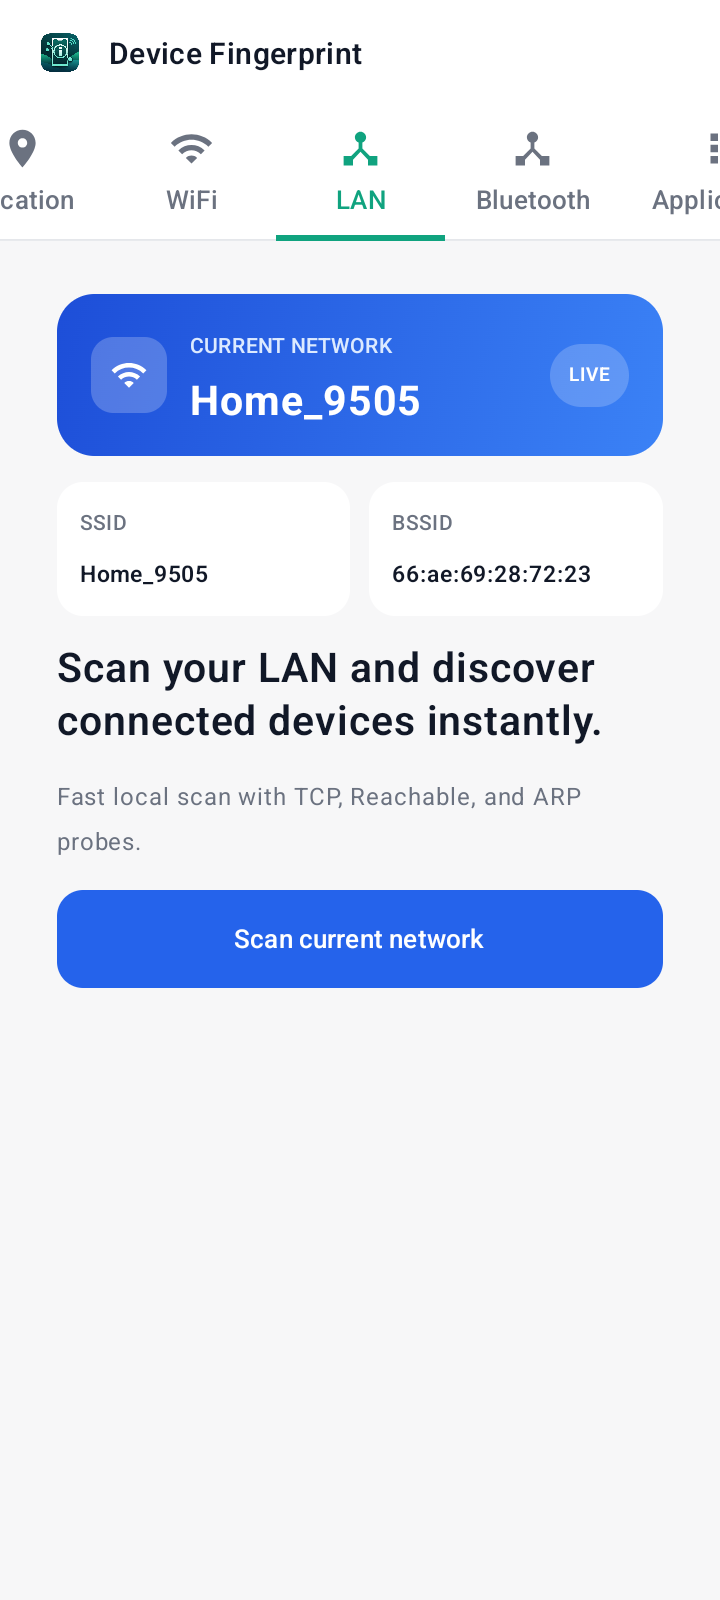
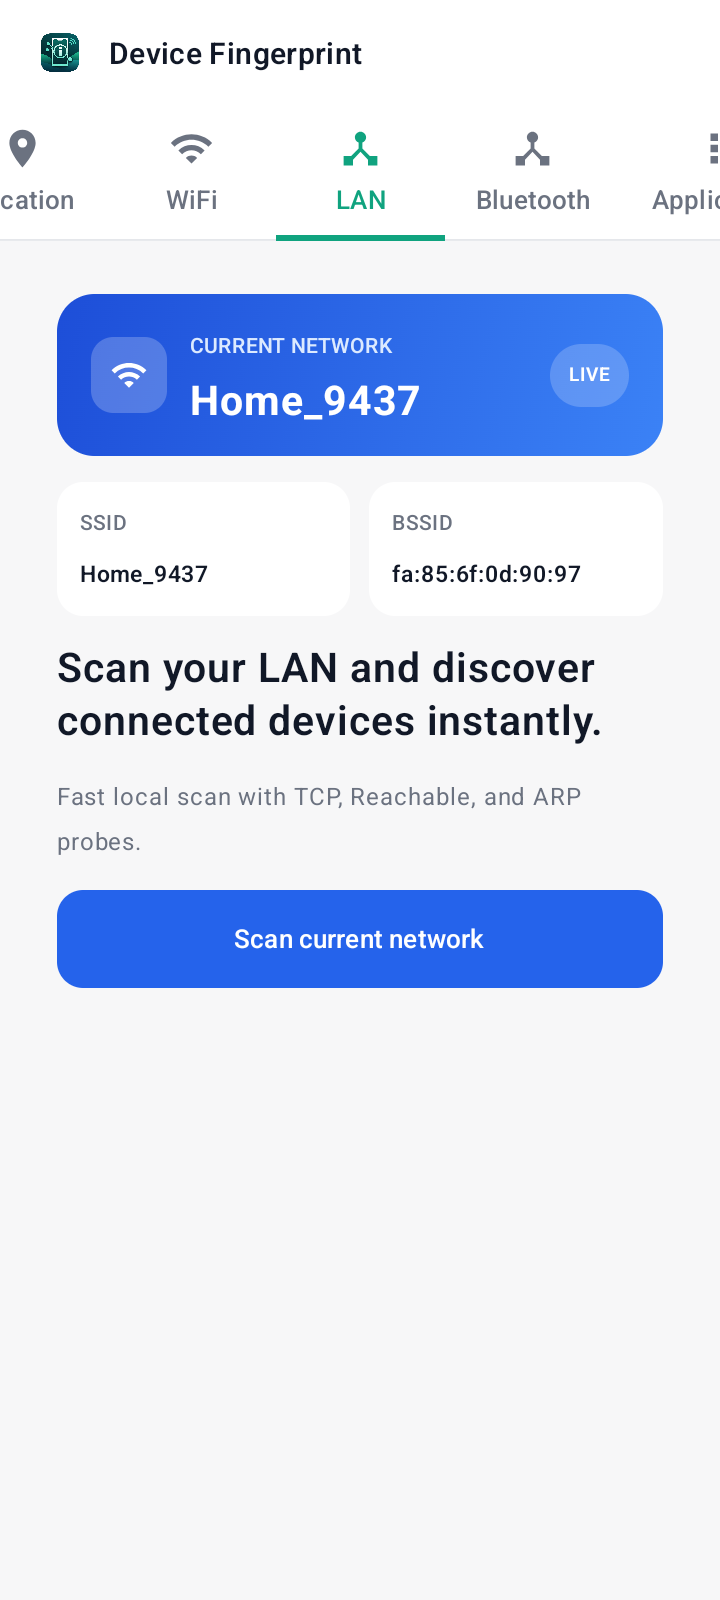
- LAN tab — the current SSID / BSSID is replaced with profile values.
- Also check SIM, Location, Bluetooth and Application tabs for a fuller picture.
Step 10: Create and switch between multiple profiles
Repeat steps 6–8 to create more profiles. Each profile carries a fully independent identity that you can swap on demand.
- Create a second profile (for example, My Second Profile with a US flag).
- Switch profiles via ⋮ > Set as Active. The new identity is applied instantly to every app currently assigned to that profile — no need to reassign apps or restart them.
- Open Device Fingerprint again — the Dashboard now shows a different model (e.g. realme 12 Pro+).
- Wi-Fi and LAN tabs also reflect the new profile (new SSID such as Home_9437).

Other Features
Backup / Restore App Data
Tips and troubleshooting
- App is ready on the dashboard must be green. If not, recheck the LSPosed module switch, reboot after enabling it, and confirm Superuser was granted.
- Back up app data via Manage Backups before activating a new profile — activation wipes app data to prevent identity leaks.
- When using Use Proxy, make sure the proxy is stable; a dead proxy will leave apps in the profile without network access.
Automating with ADB?
Control profiles without the app UI using the Headless Profile API — create, configure, and activate profiles straight from ADB.
Open the Headless API guide